Further to my recent experiments with Pewter I have made some Walnut Box's and Paper weights.
here is a WIP on the way I created the Pewter inserts and ending up with Box's and Paper weights.
I made the moulds out of MDF by drilling them with a Forsener bit they were all about 8 mm deep and 60 mm wide
The first thing was to make them all a standard size so I turned a simple bit of waste wood to the shape below and brought up the Tailstop up to secure them.
they were all turned to a set size and one face turned flat
A little trick I was shown by Paul Hannaby was to catch the swarf for re melting by putting some paper below
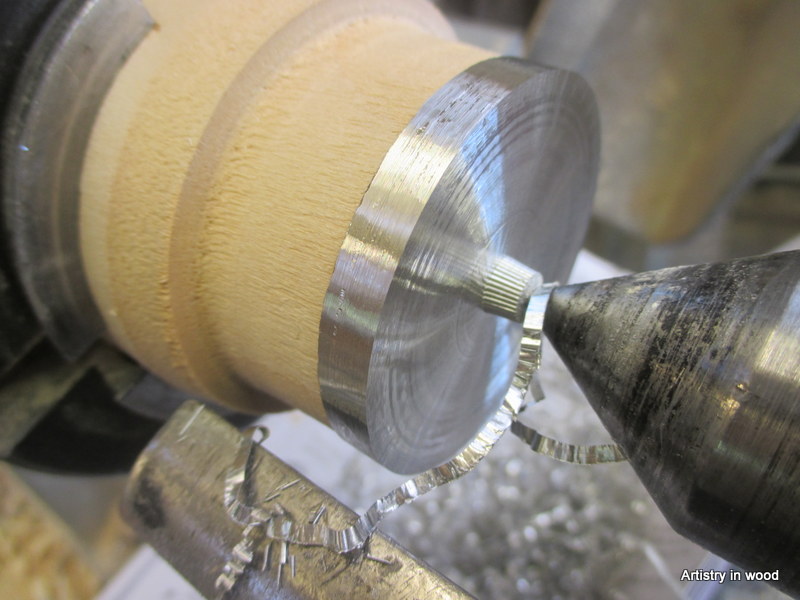
The face and the edge were turned using a parting tool this seemed the best way
These in the Pic below have all been flattened one side and the edges turned to a standard size the pattern on some of them was created accidentally by the tool chattering.
Now I needed to flatten the second side and as the edge had already been turned to size so it was not critical to be dead centre.When the moulds were drilled using the Forsener bit it left a pointed hole in the bottom of the mould. As I could not bring the tailstop up to a fine point on the Pewter I gave the point a bang wit a hammer creating a flat surface to locate the tailstock on.
These were then simply flattened off to an approx thickness of about 5 mm
Swarf collected ready for re melting.
That is the Pewter discs sorted now to put them to good use I have decided to make Box's from this lovely Walnut with textured Pewter inserts.
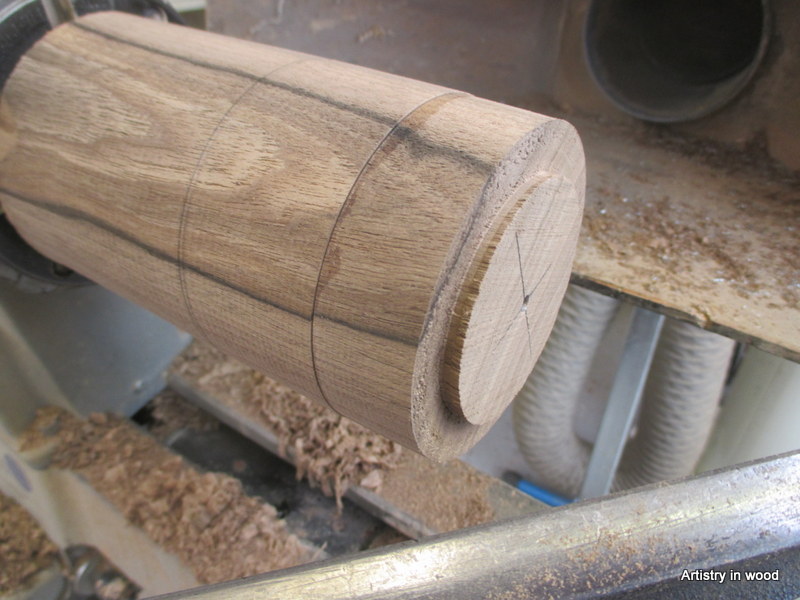
This bit of Walnut is approx 18" x 4"and I was thinking I could get three Box's from it.
I cut the wood into three pieces 6" long intending to make a Box from each.
First the blanks were turned down to round approx 3" and a spigot on both ends.
When I looked at the rounded blank the form seemed to work best with a shorter Box so I decided to make it 3" long with a lid 1" so working to the thirds rule.The lid was parted off and reversed into the chuck
I shaped and finished the inside of the lid and created a recces for the lid to fit the base.
Here the lid is fitted to the base with a very tight fit because later I will need to work on the lid without it coming loose.Doing it this way I get a perfect grain match.
When all the work was done on the lid I eased it so that it was not too tight
Now I need to insert the Pewter disc turn it flat with the wood and do the texturing.I could have used a forsener bit at this stage but preferred to create the recess with a Skew chisel on its flat as a scraper because even though I was gluing the insert in I wanted it to be a tight fit.
The Pewter insert is now glued in and the fit is snug.
Outside of box shaped and sanded insert ready for a bit of texture.
Some texturng added to give it a bit of interest
Here is another bit of texturing on the second Box
This is the Box finished and polished
Because I decided to make the Box's shorter there was a useful bit of Walnut blank left so rather than waste it I made it into a paper weight.
This picture shows the two Box's and the two Paper weights I made this morning.
The two at the back are Box's and the two at the front are Paper weights
The following four pics show the texture detail.
Thank you for looking please leave a comment.


Looks good George. Thanks for taking the time for the tutorial. I seen a pewter rimmed bowl about a year ago, and always wanted to try. You make it look pretty doable.
ReplyDeleteThank you I dont know who you are but I apreciate your comment.I have only started using Pewter recently so it is all a bit new to me
DeleteGreat blog George
ReplyDeleteThank you for looking Steve I am pleased you like it
DeleteThese are perfect! I'm amazed. A true craftsman.
ReplyDeleteThank you Shaz
ReplyDeleteFascinating I should think it is very satisfying as well to do.
ReplyDeleteThank you it something new to me and i am enjoying learning
DeleteFascinating
ReplyDeleteThank you Michael
DeleteThank you Michael.
ReplyDeleteThank you George, nice to see interesting ways of enhancing woodturning, without buying stock castings etc.
ReplyDeleteThank you Pete I am pleased you found it interesting
ReplyDelete