The problem with that is that I would end up making ten times as much as I sell and instead of reducing stock it builds more and defeats the object of the exercise.
So it gives me an opportunity to have a play and create new effects.
I was recently demonstrating at Yandles woodworking show and Martin Sabin Smith gave me some Wax's to play with.
Here is some info with pics on something I did today followed by some I did yesterday.
This is not necessarily the way that Martin Saban Smith would do this but it is the way I do it some of this might seem to you to be unnecessary but i achieve the finish that I am after.
I started off with an Ash blank with very nice grain and scorched it very heavily to enable me to remove a lot of the soft grain sometimes I scorch it twice.
Next I removed the soft grain with this Liming brush from Chestnut products
I followed this with a good burnishing with this bristle brush from Chestnut products
I always apply a sealer after scorching and colouring as it stops any bleed from the carbon and helps to stop fading when coloured here I used Chestnut Cellulose sanding sealer by spray
Ready to apply Green Wax very important to seal before application of wax to avoid smudging this way you can wipe the Wax of the hard grain and leave it only where the soft grain has been removed
Green wax applied with fingers and allowed to dry for about ten minutes.I did find that the wax is quite soft and by leaving it to dry a bit when I buffed I did not remove too much of the Wax from the grain.
A close up of the filled grain
From here on you might think that I am going a bit over the top I don't think I am because the results
are what I like to achieve. I have now turned out the centre and sanded down to 1000 grit then used Yorkshire Grit you might think this is unnecessary as Yorkshire grit recommend sanding to 240 but again this is the way I do it. I used Yorkshire grit to get an even finer finish than achieved by 1000 grit abrasive.The white you see is dust
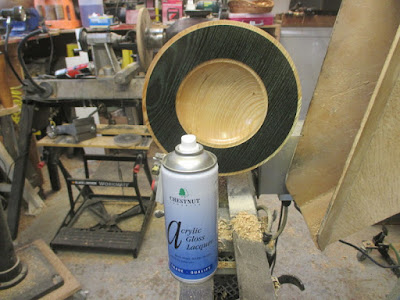
Dust removed and Chestnut Acrylic spray on lacquer applied to seal in the wax
I have then applied two coats of Chestnut spray on Acrylic Gloss lacquer wet on wet application.
Then I used Chestnut Cut and polish to bring up a super shine on the Lacquer
This was followed by application of Hampshire sheen High gloss by hand.
This is the finished result and I think it is a fantastic finish
here we have the finished bowl in my opinion to a very high standard.You might well think this is a bit over the top but the finish is only as good as the effort you put in.
This is another Bowl using the same process only this time it is on Oak and after scorching I applied Martin Saban Smith's Ruby stain from Intrinsic colours
This one is also in Oak same process but no colour stain
This one is also oak sanded to 1000 grit and Martin Saban Smith's carbon black stain rubbed all over and then lacquered and polished


Beautiful work George.
ReplyDeleteThank you Ligia I am pleased you like it
ReplyDeleteStunning pieces George
ReplyDeleteI dont know who you are but thankl you anyway
DeleteVery informative and brilliant result dad
ReplyDeleteThank you Mark
ReplyDeletegreat looking work George cant get any of that stuff over here shouldhave brought some back with me however theres next time hey lol
ReplyDeleteI guess that is you Chris I am suprised you cannot get Chestnut products there so who do you use for finishes
ReplyDeleteVery nice work and a great technique.
ReplyDeleteThank you Stewart I am pleased you like it
ReplyDelete