Partly due to the Pandemic and having a lot to do on our property and lake on the levels I have not done much Woodworking for quite some time.I thought it was time to start a good sized Project and as it is our Son Marks Birthday shortly and they have just moved house I thought it would be nice to make them a Resin River Coffee table.Mark and Betina have been collecting shells and bits of sea glass for quite a few years so I thought it would be nice to make a Resin River Table using some of it in the Resin top.On the Blog post I will be putting up pictures and telling you how I have done it.
There are quite a few people making these tables now and I am not sure how they do it so it will be a bit of a learning curve for me I suppose i could watch it all on Utube but would rather work it out for myself .
I will be putting up pictures and info on this Post as the work progresses please leave comments below then I will know you are following.
I have picked out a nice piece of Ash for the Table top and as you can see the surface is very rippled because it was milled with a Chainsaw
To remove the heaviest of the ripples I used a Matika 4" Belt sander.
With the worst of the rippled removed I planed the surface on my Planer but because the Planer is not wide enough I removed the safety guard.This is not recommended but with a 10" Planer and a 15" worktop it did the job but I took great care.
Safety guard and Fence back on.
I have marked out the area I wanted to recess and made a start with a Router but to be honest did not get on at all well.I was going to rout the outside of the recess then remove the center waste but I found controlling the Router and getting a nice flowing line was not easy so I abandoned the Router idea.
I decided to get nice flowing lines it would be better to remove the River on the Bandsaw.
I have used a very thin 3/8" 4 Skip blade and it worked a treat.
Here we have what will be the River with nice flowing lines
The River has got to be quite a bit lower than the top of the table to allow for placement of shells and bits and pieces .The river has had 18mm removed on the thicknesser
Because the blade was very thin it is a nice snug fit.and has the required 18mm recess
Prior to gluing up cling film has been put over the bench so as not to have it stick to my workbench
The gluing up is done with Gorilla glue as this is an expanding Glue and it will make sure the is no space for the Resin to leek through.
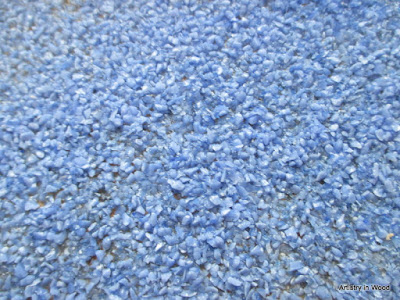
I thought it would be nice to have a blue background for the shells and bits to sit on as this would give a nice contrast to the Ash.To create this effect I have applied Glass Frit on resin to give colour and texture.
This a close up of the Glass Frit when the bits and pieces are applied I hope it will look ok
That's it for now but i will be adding more pics and info as the work progresses please comment below.
I have been busy with other things and only just got back to working on table top.
I have placed the Shells Glass and stones in the river and set them in a thin thickness of Resin.
More resin added building up the thickness slowly


